Showing posts with label Baking. Show all posts

Friday, February 15, 2013

Soft Raisin Cookies #52cookies

This is a cookie my Mom used to make when I was a child but I haven’t made it in forever because I live with a raisin hater! 

Yes, Hubby HATES raisins – so much so that he wouldn’t even try one of these cookies!  The worst part about his hate for raisins is it seems he has somehow passed on the genetic hate of raisins to our children.  They both tried a cookie but they picked out the raisins!  Seriously!  Freaking crazy kids!

Oh and when I told them that raisins were merely just tried grapes – they did not believe me.

Anyway, I like these cookies but they were not a panel favourite and now that I have had some feedback and looked at the ingredients, they are more of a muffin than a cookie.  So if you are looking for an excuse to eat cookies for breakfast – here you go!

At Home Panel:

Little Boy: (as he is spitting out a raisin) it’s good, I like them, I don’t like the raisins.  They are very soft.
1 out of 5 stars

Little Girl: Are there raisins in them?  I don’t like raisins. They are tasty. 
2 out of 5 stars

Hubby: refused to allow a raisin to pass his lips.

At Work Panel:

Brent:  It’s not a cookie.  It’s a muffin.  It’s a good muffin.  It tastes like a chocolate chip muffin without the chocolate.
1 out of 5 stars

Bryce: Good, unique.  I would call it a breakfast cookie.
4 out of 5 stars

Sandee:  Too dry, they don’t have a lot of flavour.  The raisins are good, I like that they are round and thick.
2 out of 5 stars

Barb: Not my favourite.  You would probably like them if you liked scones.
2 out of 5 stars

Adam: Like grandma’s cookies.  (He came back for more.)
3.5 out of 5 stars

Sarah: I like the softness, needs more raisins or something.  Something is missing?  A spice?  Cinnamon maybe?
3 out of 5 stars

Average rating: 2.9 out of 5 stars


Soft Raisin Cookies

3 cups all-purpose flour
¾ teaspoon baking soda
½ teaspoon salt
1/3 cup butter, at room temperature
2/3 cup sour cream
2 cups lightly packed brown sugar
1 teaspoon vanilla
2 eggs, lightly beaten
3 cups all-purpose flour
¾ teaspoon baking soda
½ teaspoon salt
1 cup raisins

Preheat oven to 375F.
Sift together the flour, baking soda and salt and set aside.

Using either a stand mixer or by hand, beat together the butter and sour cream until well mixed.  Add in the brown sugar, vanilla and eggs and continue mixing, scraping down the sides as needed.  Slowly add the flour mixture and mix until just combined, then add in the raisins and stir until incorporated.

Drop by rounded tablespoon onto parchment lined baking sheets and bake for 12-14 minutes until nicely browned and set.

Yield: 3 1/3 – 4 dozen cookies.
Little Girl's plate of picked out raisins.

Monday, February 04, 2013

#52cookies - Chocolate Florentines


One of the best parts about this cookie challenge is I am making cookies I normally wouldn’t make and finding out my family likes them.
Before I tended to stick to sugar cookies, chocolate chip and the odd peanut butter thrown in, but now – well I obviously need to expand my repertoire if I am going to get 52 different cookies made.

I have never made Florentines before and I think I might have only ever eaten one, so there was a little trial and error and I also wasn’t really sure what I was looking for in texture etc.  Thankfully my At Work panel was very knowledgeable in Florentines and gave me some great info / feedback.

At Home Panel: (The chocolate had not had a chance to harden; hence their comments about the mess.)

Little Girl: Kinda slimy, kinda chocolaty inside.  I like it.  A bit messy.
5 out of 5 stars

Little Boy: Sandwich cookie.  I really like it.
5 out of 5stars

Hubby: Extremely chocolaty, it’s almost a little overpowering.  Pretty messy.
3 out of 5 stars

At Work Panel:

Barb: Very tasty; hard – are they supposed to be hard?  Mine is hard on the outside.
3.5 out of 5 stars

Sarah: These are good.  5 out of 5!  One cookie is enough at a time.  Soft fancy cookie.
5 out of 5 stars

Sandee: I love Florentines; I usually have the nougat ones, I’ve never had this kind before.  They’re great.  They are chewy but not too much so they tick in your teeth.
5 out of 5stars

Andy: It’s very good; but anything chocolate is a hit for me.  I like the texture; I like chewy cookies.
4 out of 5stars

Bryce:  Really good.  I like the oatmeal part; a bit too sweet because the chocolate is so sweet.
4 out of 5 stars

Brent:  Pretty good.  I like these.  This is an overload of my favourite cookie.  Definitely needs a coffee.  Just the right amount of crunchy and chewy.
5 out of 5 stars

Amber: Delish.  Good cookie to chocolate ratio.  I like that they are chewy.
4.5 out of 5 stars

Overall rating: 4.9 out of 5 stars

My notes:

The original recipe calls for milk chocolate chips, I only had semi-sweet chocolate chips so that is what I used.  If you used milk chocolate they wouldn’t be as sweet, and you could use dark too if that was your favourite chocolate.

I used 2 different cookie sheets to make these; one was a nice thick one and the other one is thin.  The cookies made on the thick sheet turned out better.  They were softer and chewyer.
It is very easy to under cook these cookies, if you under cook them THEY WILL NOT COME OFF THE FOIL!  At the same time it is pretty easy to overcook them.  I suggest if you are making these and need specific amount, make extra – the first few might not turn out.
It is also quite a long process of baking (unless you have 10 cookie sheets which I do not).  So plan for the time – you need to let you cookie sheets cool down between batches – I ended up using my 2 thick cookie sheets once I learned the thin ones don’t work as well and it really slowed down my afternoon.

But these are cookie made to impress, they look great and a definitely taste good.


Chocolate Florentines

2/3 cup butter
2 cups quick oats
1 cup white sugar
2/3 cup all-purpose flour
¼ cup corn syrup
¼ cup milk
1 teaspoon vanilla
¼ teaspoon salt
2 cups chocolate chips (milk, semi-sweet or dark)

Preheat oven to 375F.
Line baking sheets with foil and spray lightly with cookie spray.
Melt the butter in a medium saucepan, remove from heat and stir in the oats, white sugar, flour, corn syrup, milk and vanilla.  Stir until fully incorporated. 
Using a scoop (small) or rounded teaspoon, drop onto cookie sheets.  Make sure to give lots of space since these cookies will spread a lot.  Use a rubber spatula to spread the cookies out.

Bake for 6 to 8 minutes or until theyare just starting to turn golden. 
Remove from the oven and allow the cookies to cool completely on wire rack.  Once cooled, peel off the foil.
Take your time, there is a bit of trial and error to getting the right doneness of the cookies.
Once all your cookies are done, melt the chocolate in the microwave in 20-30 second intervals stirring in-between until smooth.
Spread chocolate on the bottom side of one cookie and top with another one to make a sandwich.
Allow to set for a few hours before consuming.

Yield: 2-3 dozen cookies (depending on how big you make them).

Enjoy!

Monday, January 28, 2013

Soft Ginger Cookies - #52cookies


I have some very fond memories of soft ginger cookies; to me they are a cold winter, comfort food cookie.  Now I am sure I could have called my Mom and had her dig through her recipes to maybe find the one from my childhood, but instead I scoured the internet for one that sounded good and I thought would bring back some memories.

Now the interesting thing about this cookie is that it was not good warm.  It was too soft and gooey and it actually stuck in your teeth, but cold, well that is a different story – so different in fact that I had Hubby try one again the next day and allowed him to revise his earlier opinion of the cookie.

This cookie pairs very well with a cup of tea or coffee – it’s not really a dunkable cookie because it is so soft, but it is yummy and has just the right flavour to pair with coffee or tea.

At home panel:

Little Girl:  Gingery; so sprinkly; gummy in my teeth (eating it warm); sugary.
6 out of 5 stars (We might need to work on that a little still.)

Little Boy: yummy; sprinkly; brown.
2 out of 5 stars (Not sure he understands this either since he kept asking for more.)

Hubby: (Trying it warm) Too gummy, sticks in your teeth; I don’t really like them but I will eat them because they are sweet and cookies
1 out of 5 stars

Hubby: (Trying it the next day cold) Much better today, too crunchy with all the big sugar crystals, not bad.
3 out of 5 stars

At work panel:

Brent: Damn good!!! Chewy, I like chewy.  Good flavour.  This would go even better with a coffee, can I have another one, I need to go and get a coffee now.
4.7 out of 5

Sandee: Ohhh, I like the softness; too much sugar on top, the one I tried rolled in regular sugar I liked better.  Perfect consistency, perfect ginger balance.
4.5 out of 5 stars

Barb: Mmmmm, I would make these and feed them to my family, nope, I would eat them all myself!  I like the sugar is crunchy and the cookie is soft.
4 out of 5 stars

Sarah: Too much molasses; not enough salt; good softness.
3 out of 5 stars
 
Bryce: Too much sugar, good consistency, nice and soft, good amount of ginger.
4 out of 5 stars

Andy: Really good; moist & sugary.  My favourite so far.
4.5 out of 5

Amber: Perfect, buttery.  I like that they are not over molassesy or gingery.  I like the sugar texture. 
5 out of 5

Overall rating: 4.0 out of 5


 Soft Ginger Cookies
 
2 ¼ cups all-purpose flour
2 teaspoon powdered ginger
1 teaspoon baking soda
¾ teaspoon ground cinnamon
½ teaspoon ground cloves
¼ teaspoon salt
¾ cup butter, softened
1 cup white sugar
1 egg
1 tablespoon water
¼ cup molasses
Sugar for rolling*

Preheat oven to 350 F.
Whisk together the flour, ginger, baking soda, cinnamon, cloves and salt in a medium bowl; set aside.
Using a stand mixer, beat the butter and sugar until soft and fluffy.  Add in the egg, water and molasses, scrape down the sides and beat until well combined.  Then slowly add the flour mixture and mix until fully incorporated.
Form walnut sized cookies and roll them in sugar.
Place on a parchment lined baking sheet and bake for 8-10 minutes.  Removed from oven and allow to cool for 5 minutes on the sheet before removing to a wire rack to fully cool.

*I used a coarse decorator’s sugar for rolling and although a few people liked the crunch it provided (and it is much prettier) the overall feeling was the cookies were better rolled in regular white sugar.

Yield: 2 ½ dozen cookies.

Source

Monday, January 21, 2013

52 Cookies - Chunky Chocolate Chip Peanut Butter Cookies


This cookie comes to us from the Nestle Toll House Best-Ever Cookies cookbook.
I have owned this cookbook for quite a while and I make their chocolate chip cookie recipe as my standard but I haven’t tried a lot of other recipes yet.
The overall rating on this cookie is more positive than negative but you will notice one major trend, everyone wanted more peanut butter in this cookie.
 
I did make a few minor changes:
The original recipe called for 2 cups of chocolate chips – I dropped it down to 1 ½ cups because there was a good chocolate chip ratio at 1 ½ cups – add more if you want, but I don’t think you need the full 2 cups.
 
The original recipe also said to bake them for 7-10 minutes – mine were nowhere near ready at 7 minutes and although I probably could’ve taken them out at 10 minutes, I wanted them to have a bit of colour – but I also got asked if they were a bit over cooked by one person.


At Home Panel:
Little Girl: Yummy; It tastes like peanut butter inside and chocolate chips!  I like the whole flavour; it was delicious!
100 out of 5 stars
Little Boy: I like chocolate chip and peanut butter.
A billion out of 5 stars
Hubby: A little heavy on the chocolate chips, there is a small hint of peanut butter but the chocolate outweighs it.  Needs more peanuts and peanut butter.
4 out of 5 stars
Me: A good cookie but the peanut butter is lost.  I like the added crunch of the chopped peanuts but it felt more like a chocolate chip cookie instead of a peanut butter cookie.
3.5 out of 5 stars
 
At Work Panel:
Andy: Really good.  Really sweet and yet moist – I hate dry cookies.
4 out of 5 stars
Brent: Needs more peanut butter – about 30% more.  A little too dry, good chocolate chip balance.  It’s a confused cookie – it’s not chocolate chip, and it’s not peanut butter – but it is trying to be both.  Tasty, just needs more peanut butter.
3 out of 5 stars
Sandee: Good but too crisp.  I like softer cookies.  Needs more peanut butter; I like the lots of chocolate chips.
3.5 out of 5 stars
Sarah: These cookies are a solid 5 out of 5.  Nice balance of sweet and salty… and I was glad they were moderately soft.  Well done!
5 out of 5 stars
Bryce: It has more of a peanut butter after taste than a real peanut butter taste.  A little too sweet for me.
3.5 out of 5 stars
Shani: Needs more peanut butter, I like the crunch, but it is unratable because it is lacking one major ingredient – peanut butter.
 
Overall rating: 3.8
Even though I explained to the kids how a 5 star rating goes, they did not quite get it and I laugh everything I think about their answers.
We had cookies for dessert the following day and they wanted me to write down their thoughts again about the cookie, this is going to be a fun year and I feel sorry for anyone that gives them a cookie after we have done a few more months of this.
Chunky Chocolate Chip Peanut Butter Cookies
Source: Nestle Toll House Best-Ever Cookies book


1 ¼ cups all-purpose flour
½ teaspoon baking soda
½ teaspoon salt
½ teaspoon cinnamon
¾ cup butter, softened
½ cup white sugar
½ cup brown sugar
½ cup creamy peanut butter
1 egg
1 teaspoon vanilla
1 ½ cups chocolate chips
½ cup coarsely chopped salted peanuts


Preheat oven to 375 F.
In a separate bowl, mix together the flour, baking soda, salt and cinnamon.
Using a stand mixer, cream the butter, white sugar, brown sugar and peanut butter until soft and fluffy.
Scrape down the sides and then add in the egg and vanilla. Once incorporated, slowly add the flour mixture and mix until combined.
Mix in the chocolate chips and peanuts with a wooden spoon.

 Drop onto parchment lined baking sheets in rounded tablespoons (I used a 2 tablespoon scoop). Flatten slightly with a fork and bake for 10-12 minutes until edges are set but centres are still soft.
Cool on baking sheet for 4 minutes before removing to cool on a wire rack.


Yield: 3 dozen cookies.


Thursday, January 17, 2013

Cookies, Cookies and More Cookies

A long time ago I stumbled onto a blog a woman was writing where she was baking her way through a cookie cook book.

And then there was Julie Powell who cooked her way through Julia Child’s Mastering the Art of French Cooking and not only blogged about it, but got a book and movie deal out of it too.

Now I am not looking to become famous, write a book or even have a movie made about me (however I would like to say that if this does happen, I want Jennifer Garner to play me), but I just love the concept of cooking through a cookbook or baking with a specific reason / target in mind.

So after years and years of thinking about it, I am taking the plunge.
I am not going to bake through a cookbook, but I am going to take on a 52 Cookie Challenge.

My goal is to bake 52 different types of cookies and blog about it over the course of a year, and since it is already the middle of January I have some catching up to do.

But here is what I am doing:
I am not getting my recipes from one specific cookbook.
I will be making cookie recipes that somewhat appeal to me and also recipes that I don’t normally make.
I will be getting a panel to judge each cookie each week, give me their thought and a rating out of 5.
I will be blogging this whole process and sharing the recipes with you all.

I will be making the cookies on Sunday, having my home panel give me their thoughts and then bringing cookies into work on Monday and Monday morning my work panel will give me their thoughts.

I haven’t quite worked out what day I will get each post up but I do know I will be working one week ahead – this will give me time to put together the post not have to kill myself on Monday nights.

But the first post will be up Monday January 21st, but here is a sneak peek for you...


Thursday, November 29, 2012

Rainbow Cupcakes and a Birthday

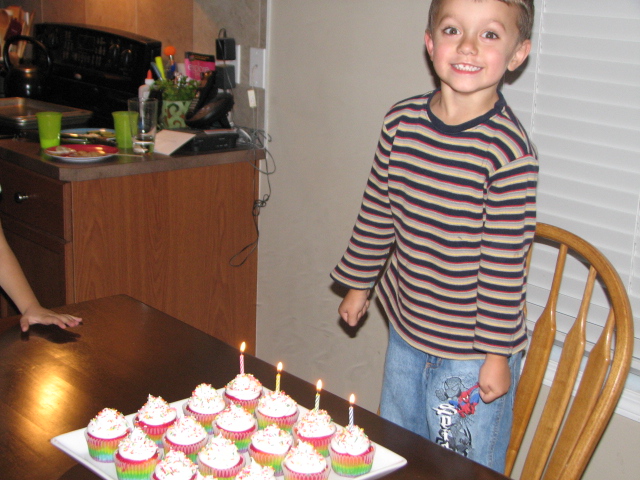
In my blogging absence I missed sharing with you all Little Boy’s birthday.  He is now 4!
We kept it simple this year and just had family over for dinner and cake.


He asked for a rainbow cake, so off I go to Google and Pinterest stalk I went.  I came across this recipe and made a few changes, the main one being cupcakes instead of a cake.


The kids both LOVED these and now I am making rainbow cupcakes for Little Girls birthday too.

These are actually just a white cake, you can cheat and use a box mix but that is like swearing in my house – I am a firm believer of cake from scratch vs. cake from box.

 
Rainbow Cupcakes 
These are a bit painstaking to make, but it's worth it. Everyone loves them (young and old), but I am not saying anyone in particular is old.3 cups all-purpose flour
4 teaspoons baking powder
½ teaspoon salt
1 cup unsalted butter, room temperature
2 1/3 cups white sugar
3 large eggs
2 teaspoons vanilla extract
1 ½ cups milk

Preheat oven to 350 F.
Line 24 cupcake tins with papers, set aside.

Mix together the flour, baking powder and salt in a bowl, set aside.
Using a stand mixer with the paddle attachment, cream together the butter and sugar until light and fluffy.  Add the eggs one at a time, then the vanilla and mix until well incorporated.   Add the flour and milk in alternating additions, beginning with the flour and ending with the milk.  Mix until well combined, scraping down the sides as needed.

Divide the cake batter evenly between 6 bowls.
Add food colouring and then spoon 1-2 tablespoons of each colour into the cupcake tins, spreading out each colour evenly as much as possible.

Rainbow food colouring chart: (I used the cheap food colouring you can buy in the grocery store for this and it worked great.)
  • Purple: 9 red and 6 blue drops
  • Blue: 12 drops
  • Green: 12 drops
  • Yellow: 12 drops
  • Orange: 12 yellow and 4 red drops
  • Red: 18 drops
Bake for 20-25 minutes until cake tester comes out clean.

Once cooled ice with your favourite icing.  My first batch (the one pictured) I used a cooked icing – it tastes great but is a bitch to work with in a piping bag, I strongly recommend a nice butter cream, much easier to work with and pipe.

Yield: 24 cupcakes.
Enjoy!

Tuesday, October 09, 2012

Salted Pecan Pie Bars

I have no idea why I do this not just to myself but to you my readers too?  Why was I gone for a month?
Honestly it felt like I was gone for maybe 2 weeks at the most, time has gone into warp speed and the blog was one of the casualties.

I have been busy with Little Girl getting used to school (and me for that matter since I volunteered to be her class’ Room Mom).
Work has been busy and we have just generally been busy trying to take advantage of the last few days of our fantastic fall weather before winter and snow hit us.

Anyway, it was our anniversary this past weekend, so because I love my husband dearly and know him very well, I made him Salted Pecan Pie Bars and gave him the entire tray.  I know pathetic – but he loves them and is food really not flowers for men?

So recipe follows, this is a Pinterest find and the original (found here) actually had maple syrup in it and I did make them that way but you can’t taste the maple at all – so I have left it out of the recipe (you can thank me for saving you some maple syrup for your pancakes).


Salted Pecan Pie Bars

1 cup butter, softened
1 cup packed brown sugar
2 cups flour
2 large eggs
¾ cup corn syrup
¾ cup packed brown sugar
1 teaspoon vanilla
2 cups pecan halves
½ - 1 tablespoon coarse sea salt

Preheat oven to 375F.
Spray a 9x13 pan with cooking spray.
Using a stand mixer, cream the butter and brown sugar until combined, add in the flour and beat until crumbly.  Press into your prepared pan and bake for 12-15 minutes or until the top appears dry – you don’t want to overcook it.

While the crust is cooking, mix together the eggs, corn syrup, brown sugar and vanilla.  Stir in the pecans and pour over the cooked crust.
Spread out evenly making sure the pecans cover the entire thing.
Return to oven and cook for an additional 15-20 minutes.  Remove from oven when the filling appears mostly set.
Sprinkle with coarse sea salt.

Cool completely in the fridge before cutting.

Enjoy!

2005

2012

Thursday, August 23, 2012

Sprinkle Cookies

 
I was on Pinterest the other day and I came across a sprinkle cookie, I can't remember if I pined it, but I immediately knew I needed to make sprinkle cookies for my 2 little cookie monsters.


I took my favourite chocolate chip cookie recipe, made it as I normally would but instead of putting in the chocolate chips, I put in sprinkles instead.

Needless to say, my kids LOVED them. 
Just a note - you need quite a few sprinkles to make them actually show up (they are small and get lost easily) so you might want to think about hitting the bulk isle for some sprinkles).


Try them, your little ones and a few big ones will love the change!

Tuesday, July 24, 2012

Rhubarb Snacking Cake

Remember how I got tons of rhubarb from my sister and I made a cake with some of it.  Well this is the second cake I made before I froze the rest for my upcoming jam making.
The first cake (found here), was not a sweet, the crust was more of a shortbread style.  This cake is much more cakey (is that a real word?).  It’s a bit sweeter and more what I was looking for, it also got a better rating by Hubby.


Rhubarb Snacking Cake

Cake:
4 cups chopped (1/2 inch lengths) rhubarb
1 1/3 cup granulated sugar, divided
1 lemon, zested and juiced
½ cup butter, softened
2 large eggs
1 1/3 cup all-purpose flour
1 teaspoon baking powder
¾ teaspoon salt
¼ teaspoon ginger
1/3 cup sour cream

Crumb topping:
1 cup all-purpose flour
1/3 cup brown sugar
1/8 teaspoon salt
5 tablespoons butter, melted

Preheat your oven to 350 F.
Grease the bottom and sides of a 9 x 13 inch baking dish with cooking spray, then line with parchment paper, extending up 2 sides so you can easily pull the whole cake out.

Toss together the rhubarb, lemon juice and 2/3 cup sugar, set aside.

Using your stand mixer, beat together the remaining sugar, butter and lemon zest until light and fluffy.  Add the eggs one at a time, scraping down the sides of the bowl each time.

In a separate bowl, whisk together the flour, baking powder, salt and ginger.  With the mixer on low add the flour mixture and the sour cream alternating between the two, starting and finishing with the flour; mix until just barely combined. 

Spread the batter into your prepared baking dish, making sure to spread it evenly into the edges and corners.  Top with rhubarb, spread evenly.

For the crumb topping, whisk together the flour, sugar and salt, then add in the melted butter and stir with a fork until combined.  Scatter on top of the rhubarb.

Bake for 50 to 60 minutes, until a tester comes out clean of cake batter. 
Cool and enjoy!

Source: Adapted slightly from Patent and the Pantry who adapted it from Smitten Kitchen.

Wednesday, July 11, 2012

Birthday Cake

According to the kids and my husband, a birthday is just not a birthday without cake.

I believe in making my own cakes fron scratch as much as possible, and let me tell you - I must really love my husband because this required me to turn on the oven on Sunday (+29C) in Calgary, with no air conditioning!

I also try and make his a different type / flavour of cake each year, this year I got my insperation from Pinterest - a Mint Chocolate Chip "Ice Cream" Cake. 

First a few pictures and the recipe to follow.

The birthday boy and his cake.


So after dinner, someone comes to snuggle with her Daddy:


While someone else finishes my piece of cake:


I turn my head for a minute and look at what happens.  Oh, he is so his father's son!


The cake was delish.  The cake itself is a fantastic classic chocolate cake, but the icing tasted so much like the ice cream it is made to resemble.
Hubby, myself and the kids all gave it 2 thumbs up!
Mint Chocolate Chip "Ice Cream" Cake

David Lebovitz Devil's Food Cake

9 tablespoons unsweetened cocoa powder
1 ½ cups cake flour
½ teaspoon salt
1 teaspoon baking soda
¼ teaspoon baking powder
½ cup butter, at room temperature
1 ½ cups white sugar
2 large eggs, at room temperature
½ cup strong coffee (cold)
½ cup milk
Preheat oven to 350F.
Butter two 9” round cake pans, line the bottoms with parchment paper, set aside.
Sift together, cocoa powder, flour, salt, baking soda and baking powder.
Using a stand mixer with the paddle attachment, beat the butter and sugar together for about 5 minutes.  Add the eggs one at a time, beating after each addition.
Stir half the dry ingredients into the butter mixture, and then add the coffee and milk; continue stirring and then add the remaining half of the dry ingredients.
Divide the batter between the two pans, and bake for 25 minutes, or until done.
Cool completely before frosting.

Mint Chocolate Chip “Ice Cream” Icing
2 cups butter, at room temperature
6 cups icing sugar
2-3 teaspoons peppermint extract, adjust to taste
150g dark chocolate, very finely chopped
Green food colouring
Place the butter in the bowl of your stand mixer, beat on high with paddle attachment until fluffy and smooth.
Add the icing sugar one cup at a time (you might need slightly less or more), until you reach your desired icing consistency.
Add the peppermint extract to taste and the food colouring.  Gradually add the chocolate pieces.